Do you have “ironing day” at your home? Do you dread it? While ironing might seem like a task best avoided, it’s easier than you think when you know how to iron. It can even be fun!
Ironing makes it easy to create a good impression, whether it’s a first date or a job interview. Fresh-ironed clothes look clean, crisp, and neat. When you wear them, you look confident and successful. Who doesn’t want that?
Let’s get ready for ironing day by brushing up on the basics. Melissa Ozawa of Martha Stewart Living shared her expert advice with Fashionista. And today, I’m passing it on to you. Here are her best tips – plus a few of my own – for a fresh, crisp wardrobe.
📋 DISCLOSURE – This page has affiliate links. If you buy something through one of these links, I may earn a commission at no cost to you. Read more here.
7 Tips for Successful Ironing
Proper ironing helps you create a good impression on others. It also extends the life of your garments. See this post from Better Homes and Gardens – or this one from Lifehacker – for step-by-step instructions.
For the basics of ironing, keep reading.
1. Buy a Good Iron
This first tip is an easy one and the most important step in the process. A dirty iron (burned-on starch, melted fabric, rusty water) can ruin your favorite shirt or dress.

When it’s time for a new iron, go for quality. The heavier the iron, the better. That way, “you don’t have to apply as much pressure for wrinkles,” said Ozawa.
A heavy iron is ideal for sturdy fabrics like cotton, linen, and hemp. A model with steaming capacity is also useful.
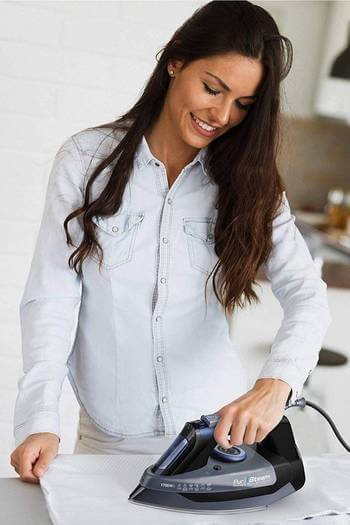
This PurSteam professional grade steam iron is Amazon’s Choice. ➝ Judging by reviews, it’s a customer favorite, too. It sells for less than $50.
For the frugal shopper, this Sunbeam classic iron is a top pick in the under $25 category. Said one Amazon customer, “this efficient and lightweight iron does the job.”
If you can spend up to $100 for a steam iron, this Rowenta model is a winner. I use a Black and Decker ProXpress (older model) but this one’s on my wish list.
2. Know Your Fabrics
Before you start ironing, identify the fabric you’re dealing with. Then set your iron’s heat dial according to the guidelines. “You don’t want to use the highest setting for something that’s not a natural fiber or polyester,” said Ozawa.
It’s a good idea to test a small area inside a garment before you iron it, to make sure there are no problems. The pressure of ironing can cause delicate fabrics to knit together and form a sheen.
When you are in doubt about a fabric, use a pressing cloth for extra protection. Place a clean square of cotton or muslin between the iron and your garment. Or use a washable mesh cloth designed for this purpose.
It’s worth noting that some fabrics are not made for ironing. Velvet, wool, silk, and embroidery are a few examples. A garment steamer works much better for delicate fabrics (more on that below). But check the care label first.
3. Water is Your Friend
Garments iron better when they’re damp, so make sure your steam iron has water in the reservoir. But should you use distilled water, deionized water, spring water or tap water? Well, it depends.
In most cases, regular tap water will do. Modern irons can handle tap water better than older models. In fact, they’re designed that way.

But some areas have extra-hard water that needs diluting first. Your iron’s user manual will tell you what kind of water to use.
Don’t have the user manual? Use filtered tap water (think Brita) or try a 50/50 mixture of distilled and tap water. This is a generally safe solution that will help your iron last long and function well.
When you iron cotton, linen, or other fabric that wrinkles easy, keep a spray bottle of water on hand. Spritz your garment from top to bottom before you start ironing it.
This glass spray bottle from Sally’s Organics works well as an ironing spritzer. To freshen up the smell of your garments, use lavender or rose water – in the bottle, not in your iron.
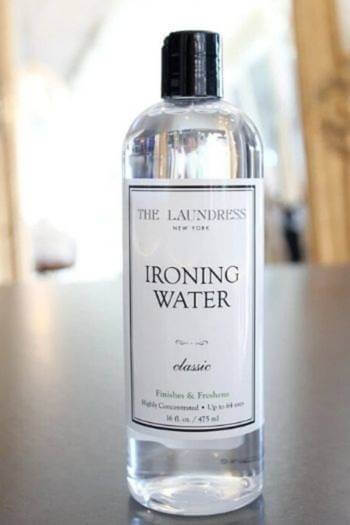
Or try some scented ironing water from The Laundress. Savoring Home readers tell me they love the fresh, classic scents in this collection. And ironing water can also add freshness to your bedding and home furnishings.
4. Work Step by Step
What about garments with pleats, ruffles, tucks, or frills? Complex garments are best tackled in steps. Take, for example, a long-sleeved shirt with buttons.
Ozawa recommends starting with the cuffs and working your way up the sleeves. Follow with the collar before hitting the yoke (shoulders). Finish with the front two panels and the back of the shirt. And iron around buttons, not over them.
Read this article for specifics on how to iron clothes – shirts, pants, dresses, and skirts. Or search YouTube for step-by-step video instructions. And if YOU have a tip that makes ironing easier, please share it in the comments.
5. Help for the Tricky Parts
Sleeves, shoulders, pleats, corners – these are more challenging to iron. Luckily, there are tools available to help you get the job done. Many of these ironing tools have uses in sewing and quilting, too.
“If you’re fastidious about [ironing the perfect sleeves], there is such a thing as a sleeve board,” said Ozawa. And a tailor’s ham can help you press and mold darts, sleeve caps, and curved seams.
When tackling pleats, lay the garment flat on your ironing board. Line up the seams and pull the pleats taut. Then press down – don’t drag the iron – to where you want the pleats to fall out.
Note: Don’t wiggle the iron around when you work. This causes fabrics to stretch or crease. To avoid stretching or puckering in the tricky parts, turn them over and iron them on the reverse side. In fact, try ironing all your garments in reverse to protect them.
6. Use a Garment Steamer
A garment steamer is ideal for full skirts and dresses that are hard to iron on a flat surface. Hang the garment against a clean surface and use the steamer to de-wrinkle it.
Amazon recommends this handheld garment steamer by Rowenta. But take care when you use it (or any steamer). “Sometimes [they] can spit and you want to make sure you’re extra cautious,” Ozawa said.
A over-the-door steamboard will protect your garment, door, and wall as you steam. This press pad steamboard has a portable fold/roll/hang design for ease of use and storage.
When steaming delicate fabrics, such as velvet, test the heat effect on a small area first. Apply the heat to the inside of the garment without actually touching the fabric. For sturdier materials, like linen, you can apply a light touch with the steamer.
7. Hang Up Your Clothes
After you finish ironing a garment, hang it in an open area – not in your closet – for a little while. Allow it to cool and dry completely before you move it to the closet.
Hanging is always better than folding, and there are some garments you should always hang. And leave some space between hangers to give your garments room. This prevents crowding, snagging, and wrinkling.
If you must fold your clothes – or pack them for travel – wait until your garments are cool and dry. Then fold them in a way that minimizes wrinkles and creases (ala Marie Kondo). For example, roll your clothes, use bundle folds, or layer folds with tissue paper. ◻️
Related Posts
- 9 Ways to Make Clothes Ironing Fun, Easy, and Productive
- Does Homemaking Matter? What You Should Know
- Ironing Tools: 10 Things You Need to Iron Clothes

Now It’s Your Turn
Thank you for reading my post. Now it’s YOUR turn to chime in. Do you iron your clothes? What is your favorite tip for achieving a neat, crisp wardrobe?
Let’s fill the comments with friendly conversation. Scroll down to leave a reply, ask a question, or just say hello. And if you liked this post, please give it a share.
Blessings, Annette
📋 SUBSCRIBE – You are reading “How to Iron Clothes: 7 Tips for Successful Clothes Ironing.” Join my email list and be a part of the Savoring Home community.
Photo Sources
- Getty Images | Canva | License
- Amazon Home and Kitchen

Make time for laundry, save time for the family. There are many good ways to reduce the time spent on your laundry tasks and spend more of your time doing the things you want to do. Like everything else, you ought to incorporate a system for doing your washing. At Laundrywala, we bring the best-in-class laundry, dry cleaning, and home cleaning services to your doorstep. https://www.laundrywala.in/
Thank you, Sunny.
Thanks for sharing this informative article.
You’re welcome, Naveen. Thank you for reading it!